15.1 Artists
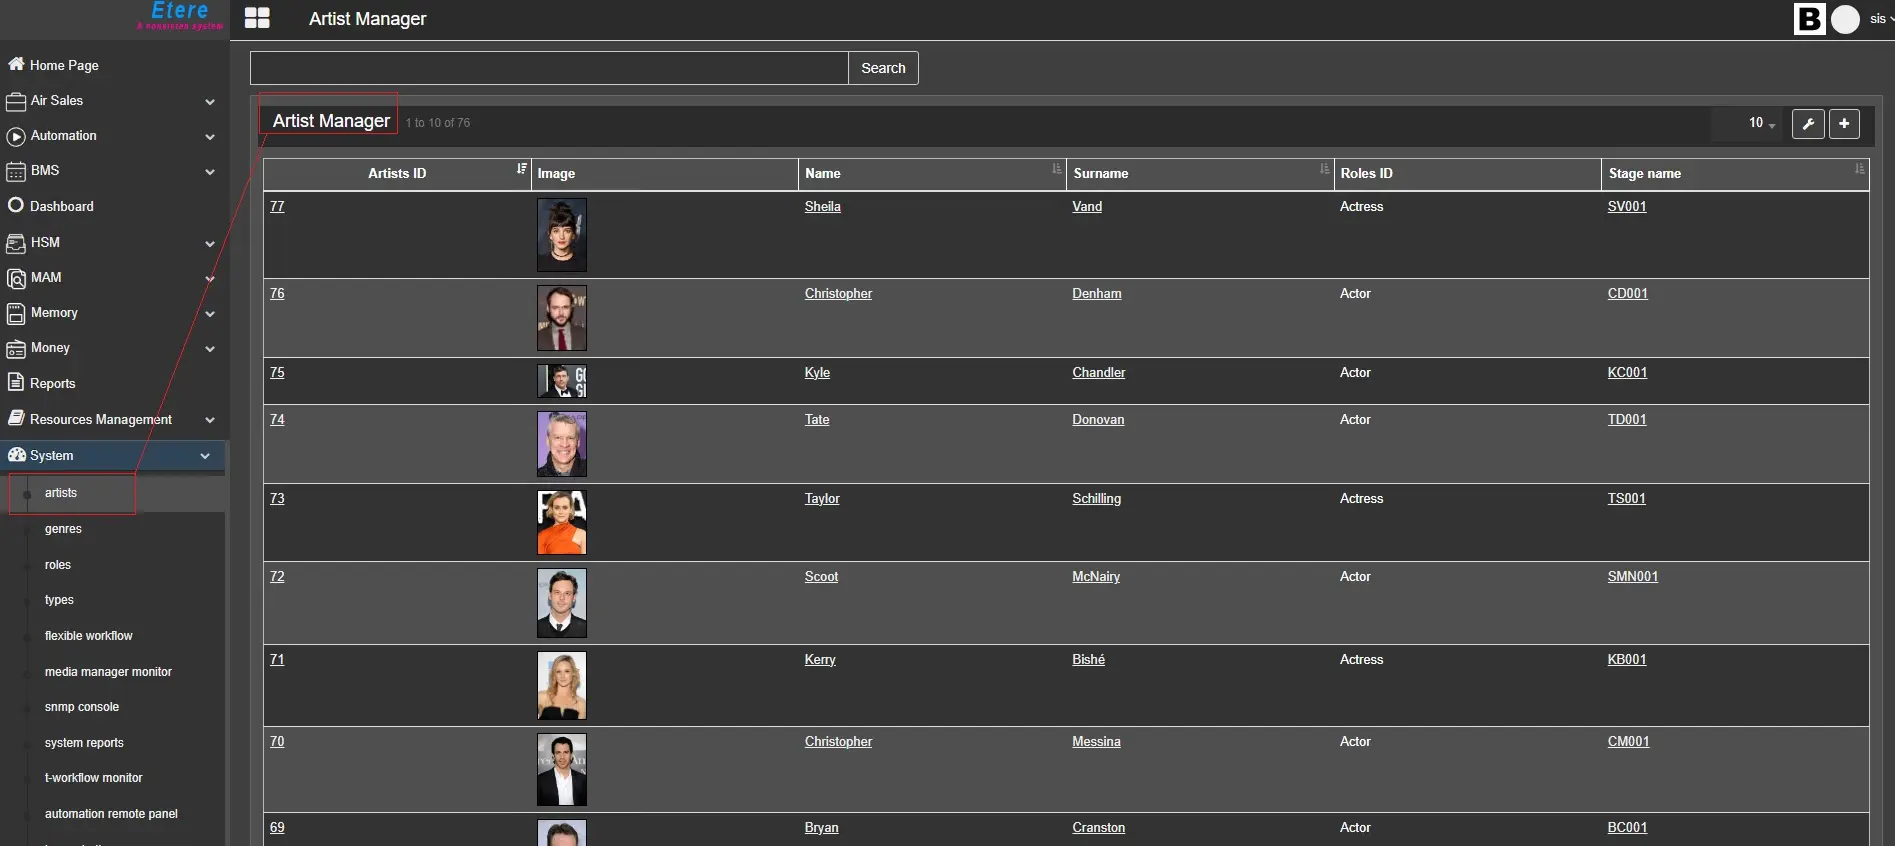
Artist manager in Etereweb can be accessed from the System section in the left-side menu.
SystemArtistsManager
Here it's possible to create and manage artists saved in the database.
CREATE AN ARTIST
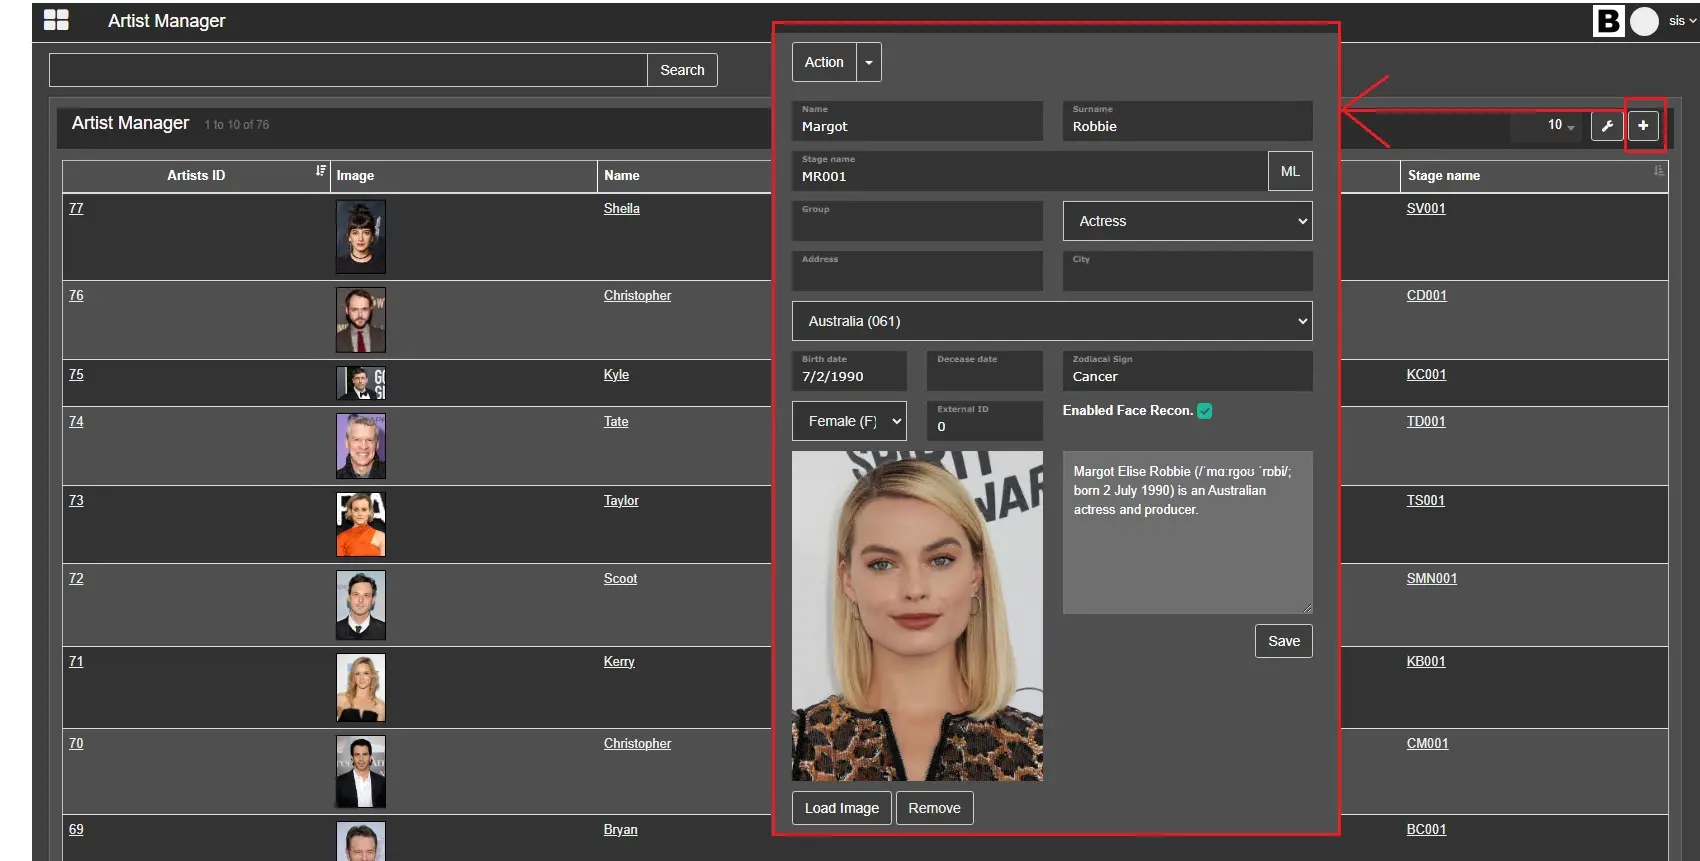
CreateNewArtist
To create a new Artist, click on the + button, and the system will automatically open a new tab where it will be possible to insert all the information requested:
• Name: The name of the artist.
• Surname: The surname of the artist.
• Stage Name: The artist's stage name.
• Group: The group/band which the artist belongs to.
• Role: The role of the artist (e.g., actor).
• Address: The address where the artist lives.
• City: The city where the artist lives.
• Country: The nationality of the artist.
• Birth Date: The birth date of the artists.
• Decease Date: The decease date of the artists.
• Zodiacal Sign: The zodiacal sign of the artist.
• Sex: The sex of the artist.
• External Id: Here, it's possible to set an external ID to have an external reference ID in case the artist has been imported from another DB.
• Enabled Face Recognition: This flag enables or disables the face recognition scan (see below for more information).
• Image: The image of the artist.
• Description: A description of the artist.
Once all the needed fields are compiled, click the Save button to update the Artists table in the database.
SEARCH AN ARTIST
To search for an artist from the web, the full-text search retrieves artists based on the artist's name, surname, stage name, or part of them. It's also possible to use AND and OR logical operators.
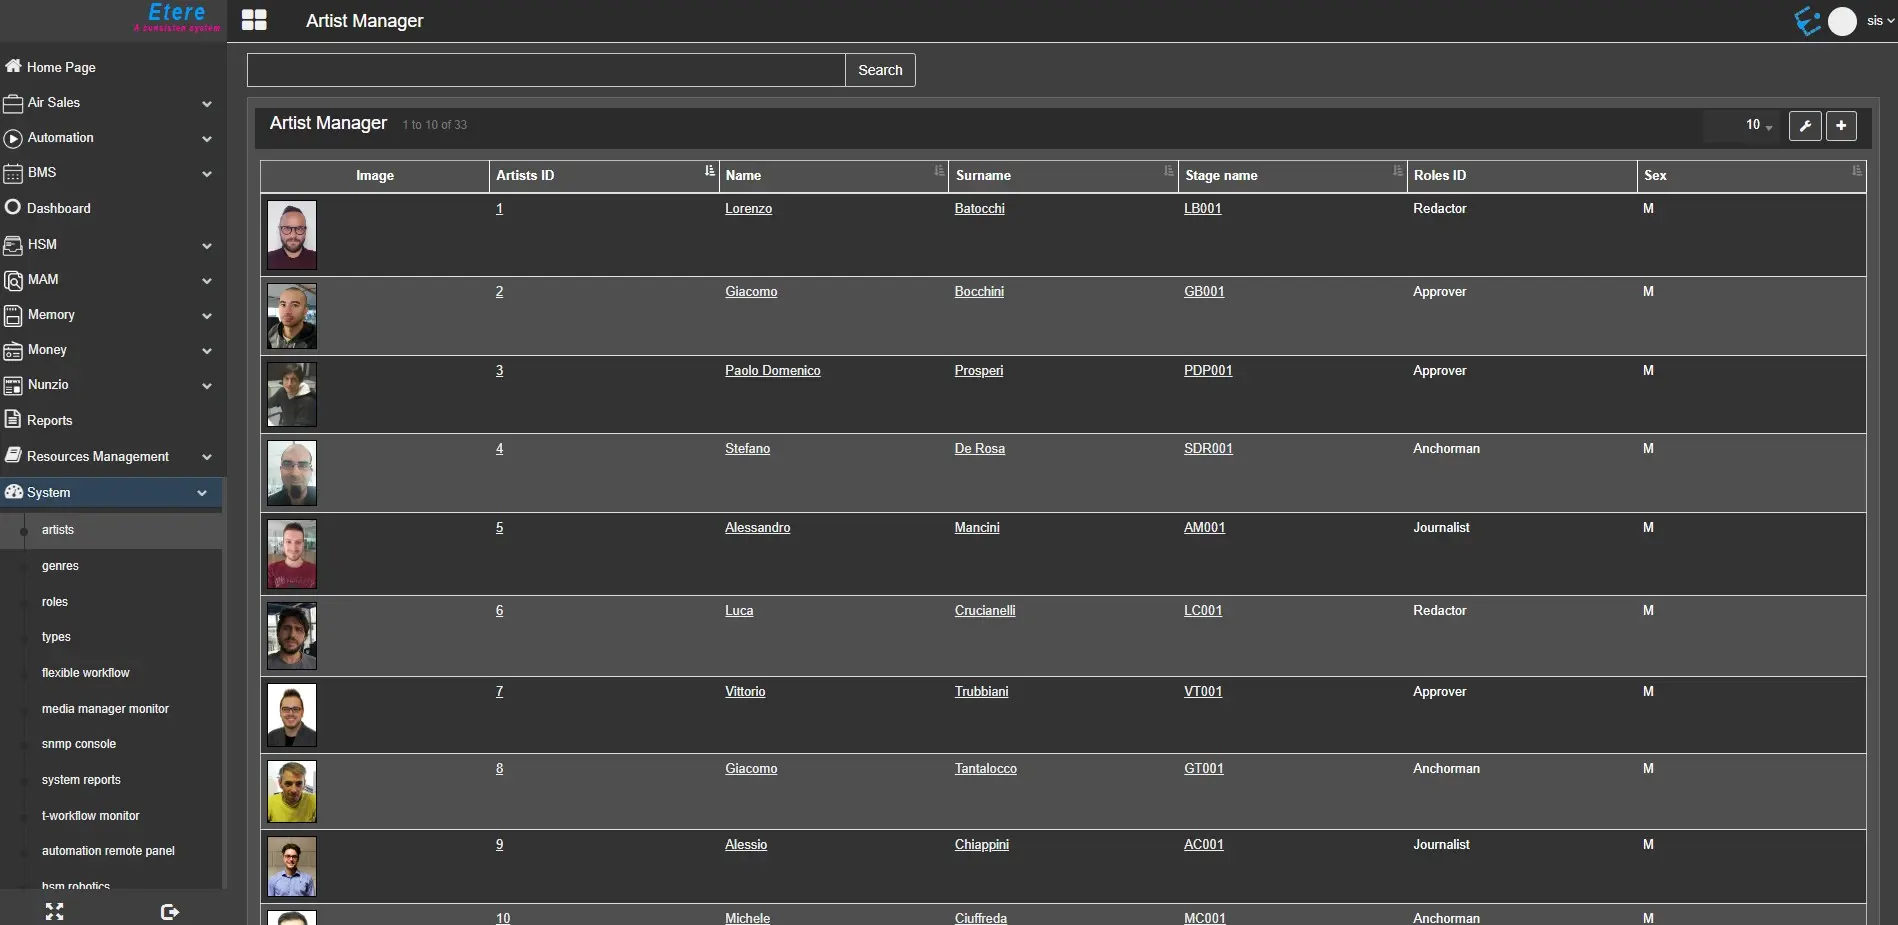
Once the search is launched, the artists who matched the search criteria will be displayed in the table. Here, it's possible to open and edit the artist's details page by clicking on the name, surname or stage name.
ArtistManagerList
In the search results table, there is the possibility to make these operations:
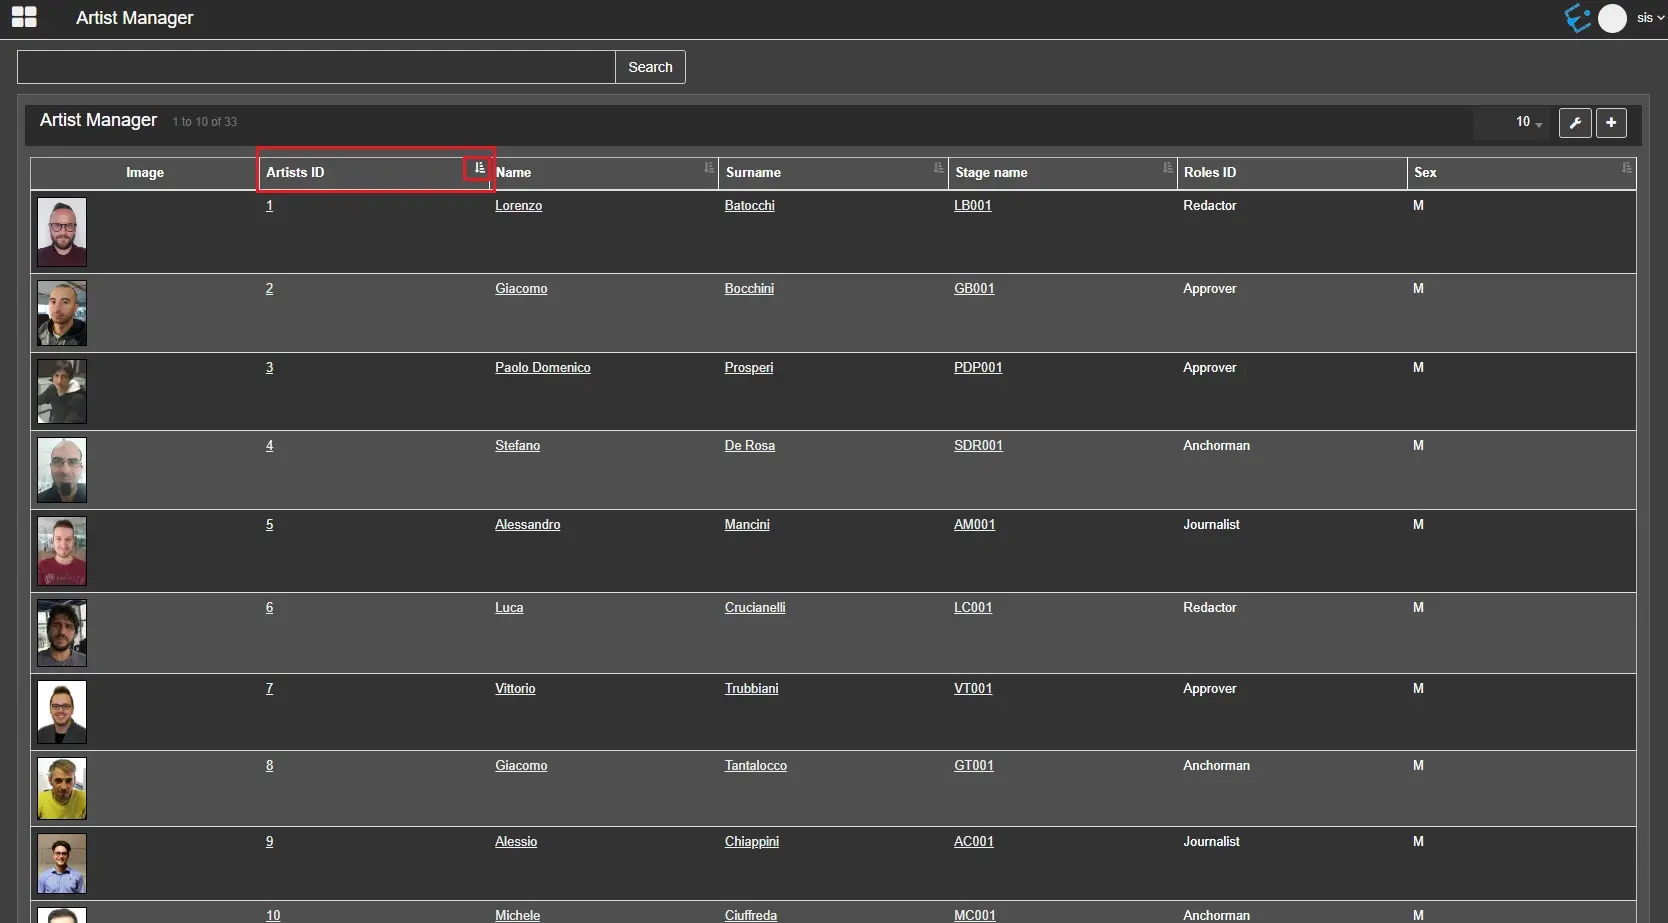
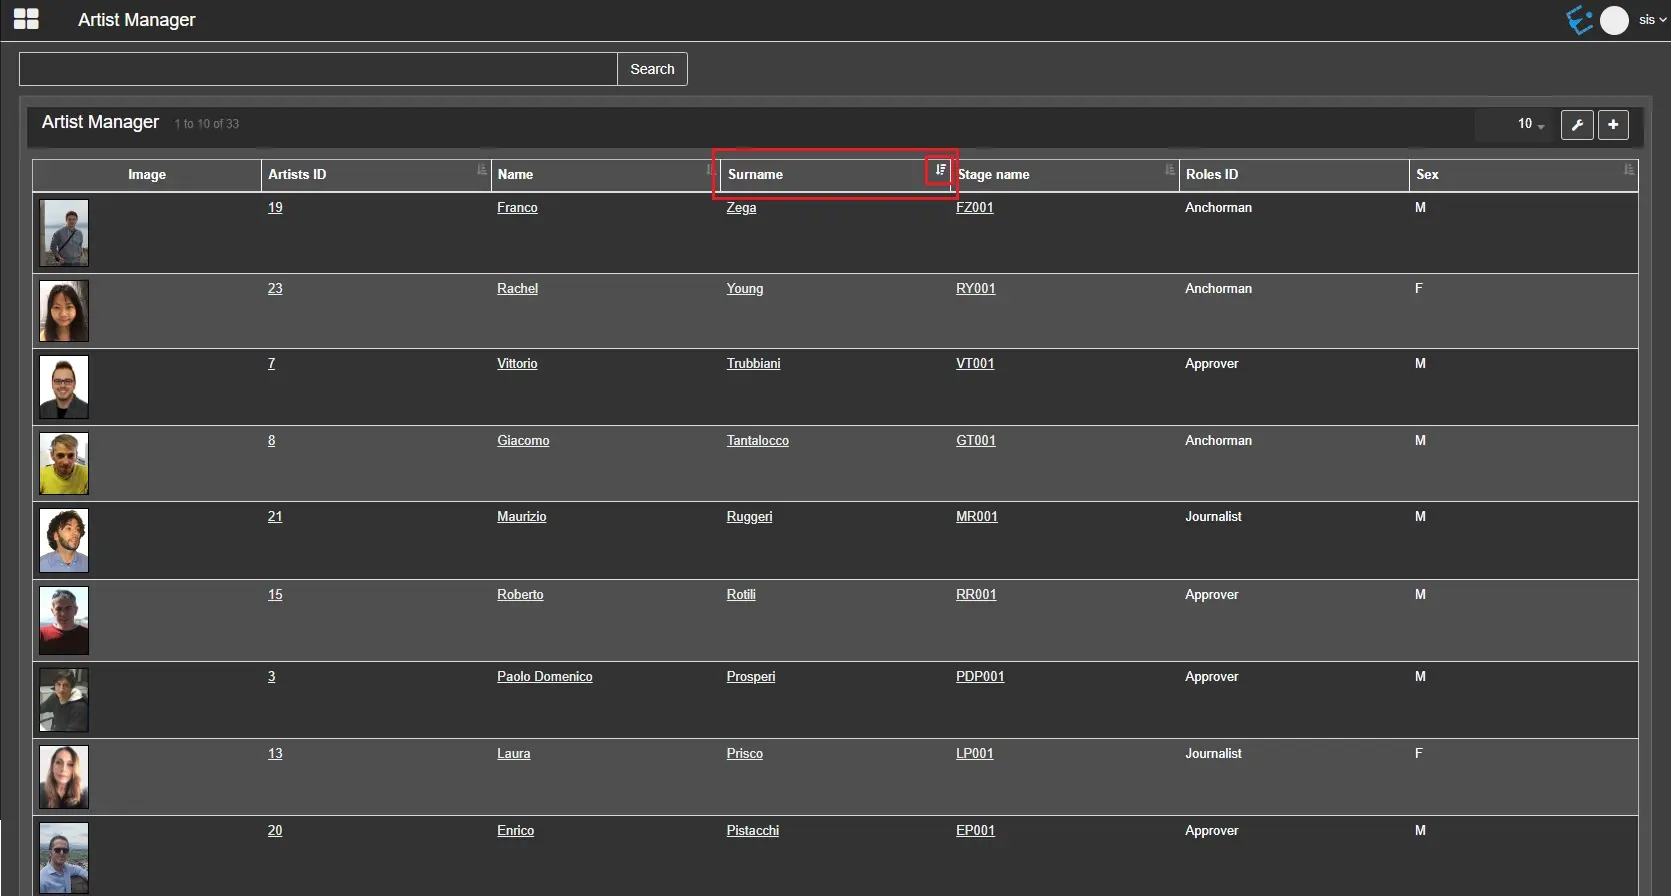
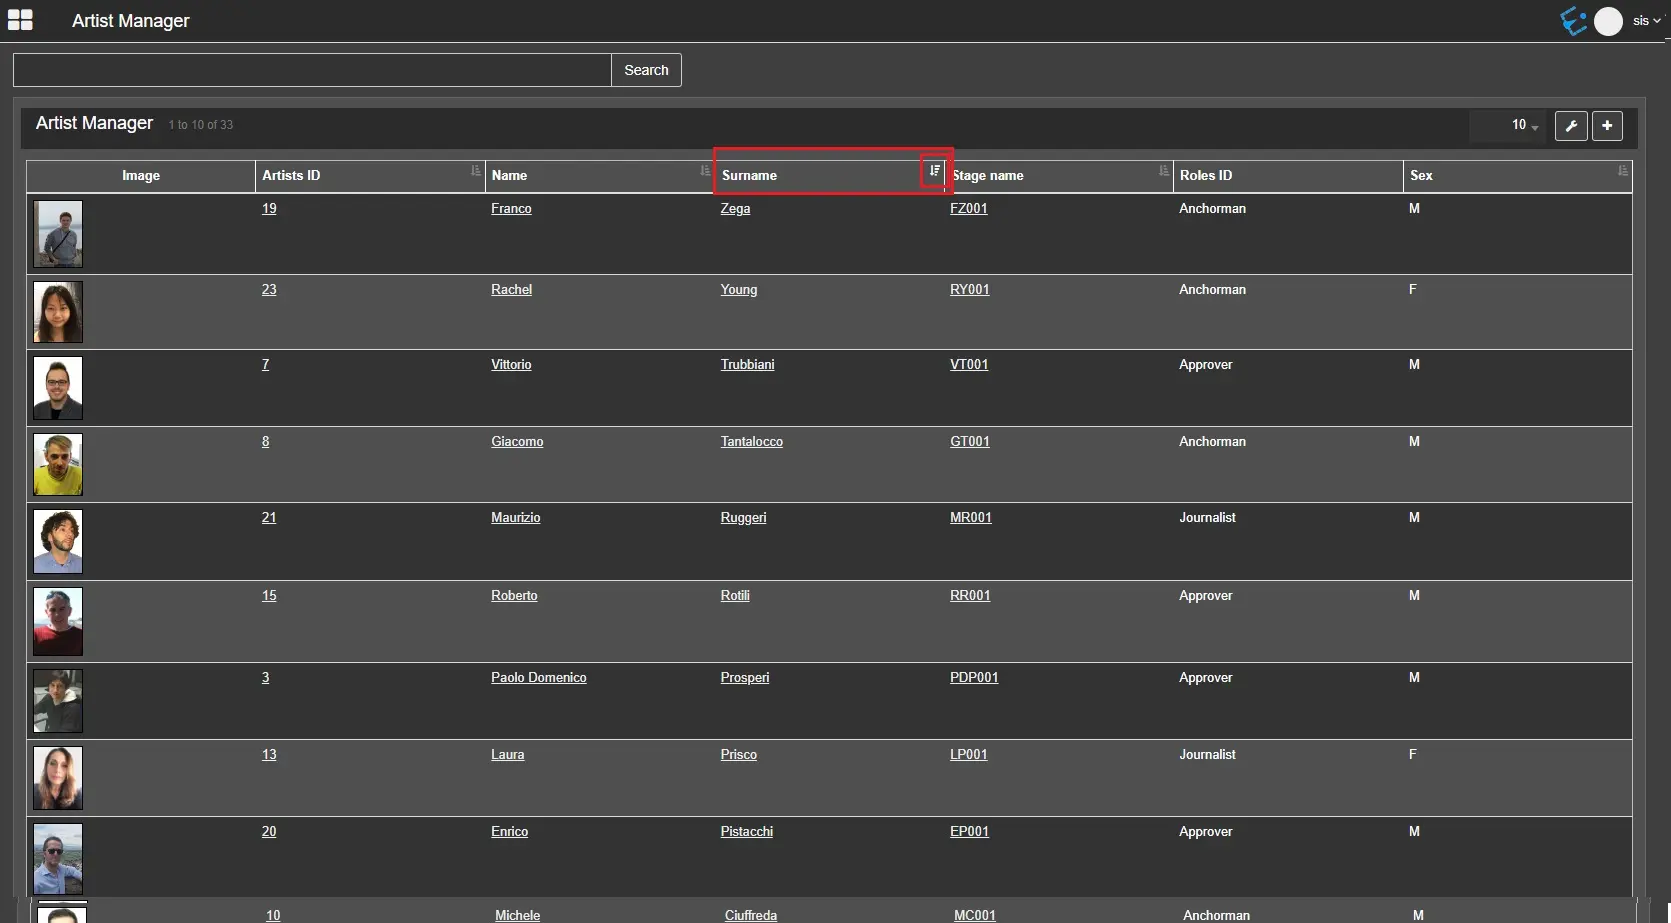
Sort the results: Clicking on a column, the results will be sorted according to the column's data (ID, name, birth date, Country, etc.) and clicking again, the user can switch between ascending and descending order. The icon at the top-right corner of the column shows the order in which the results are sorted.
SortByIDAsc
SortByNameDesc
SortBySurnameAsc
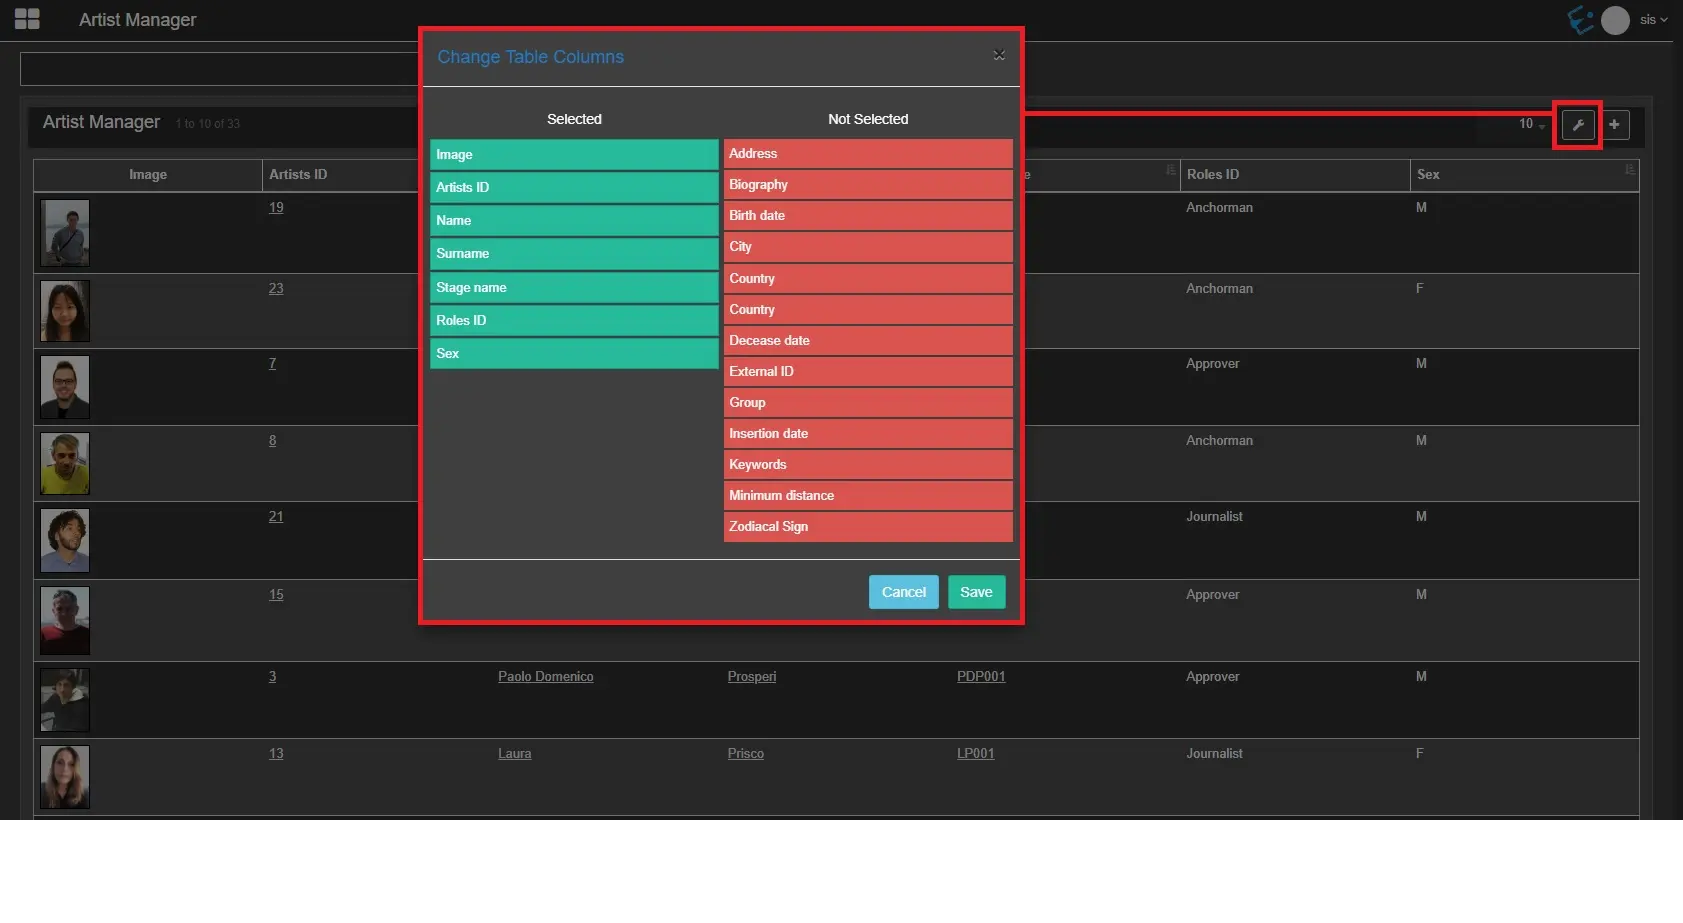
Add or remove columns: Show, hide and arrange the columns in the table, through the Column settings button.
AddOrRemoveColumns
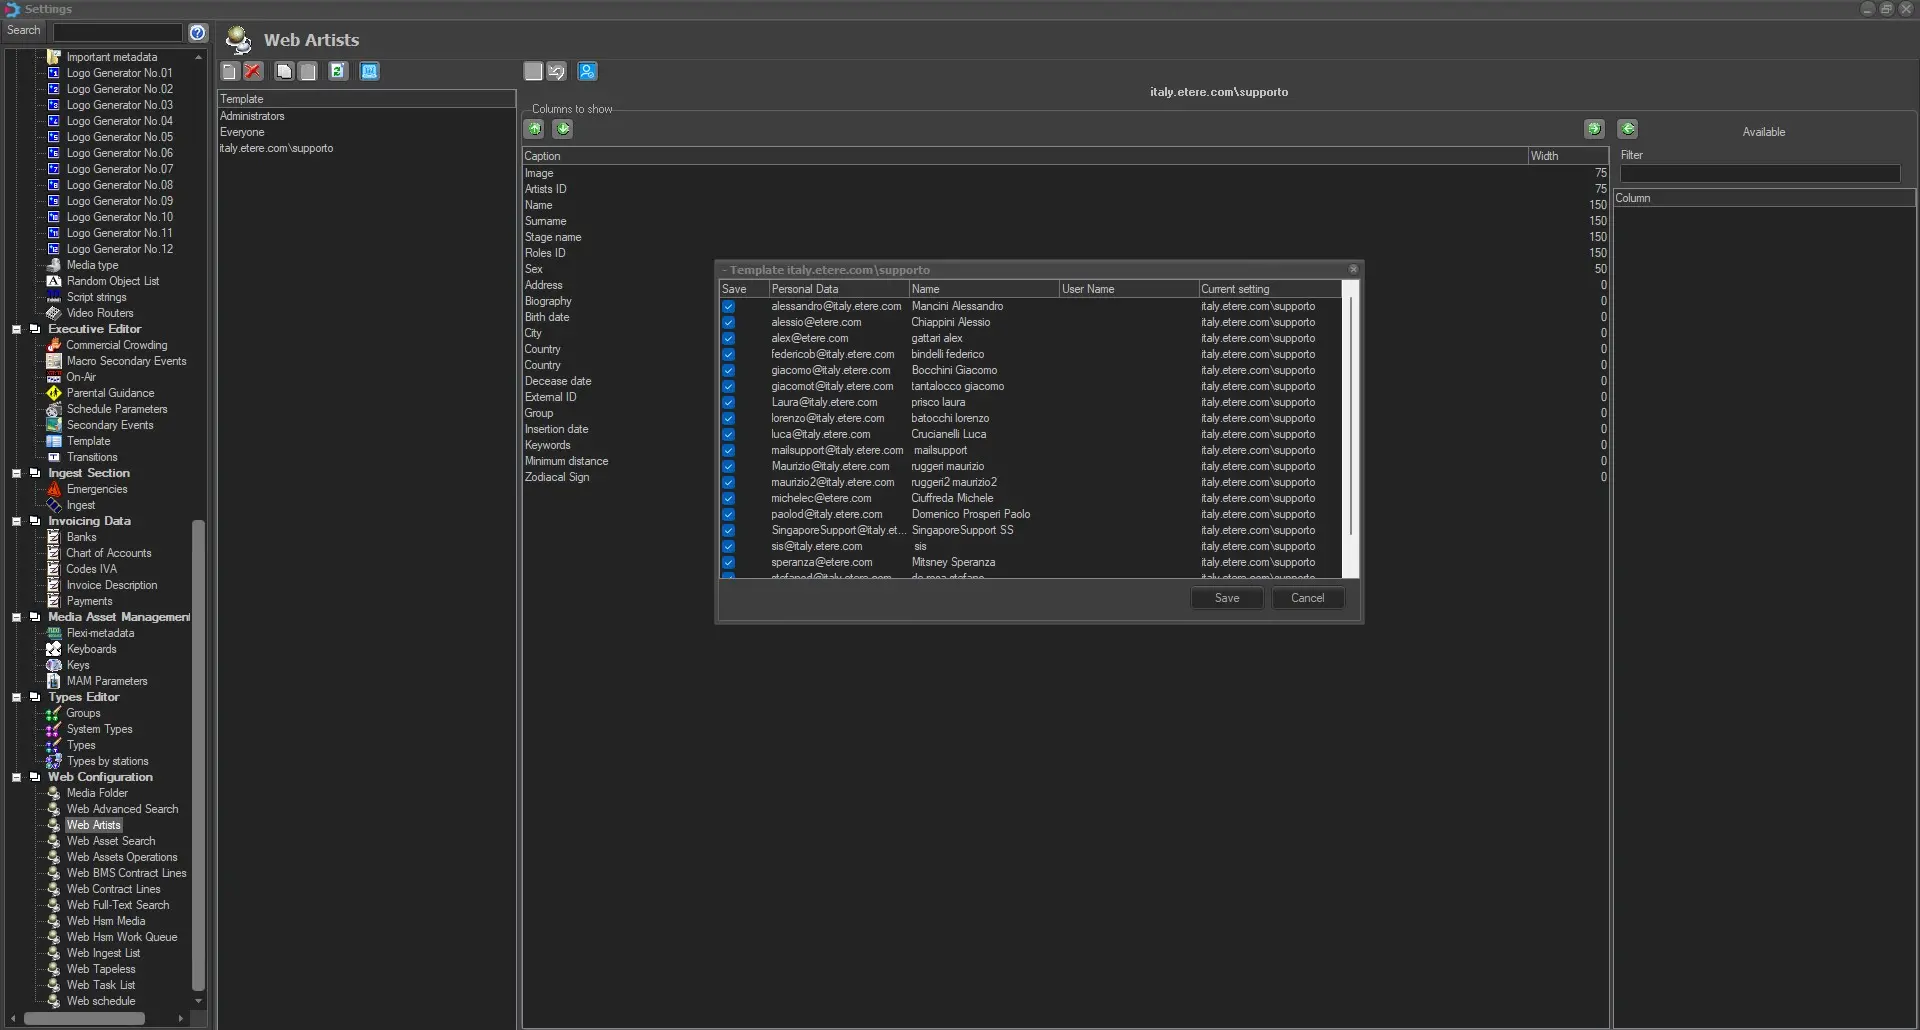
Note: To enable further columns, in addition to the default ones, it is necessary to create a customised template for each Etere group and apply the necessary rights. Find more information in chapter 59.2.49.3 Web Artist.
LayoutArtistColumns
ACTIONS
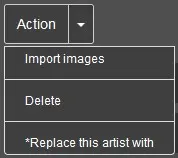
As explained above, editing the artist's information on the artist's details page is possible, but further actions can be executed from the Action menu.
Note: The action menu is unavailable during the artist creation phase, only once the new artist has been saved in the DB.
IMPORT IMAGES
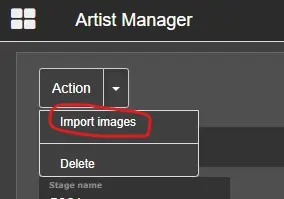
ImportMultipleImages001
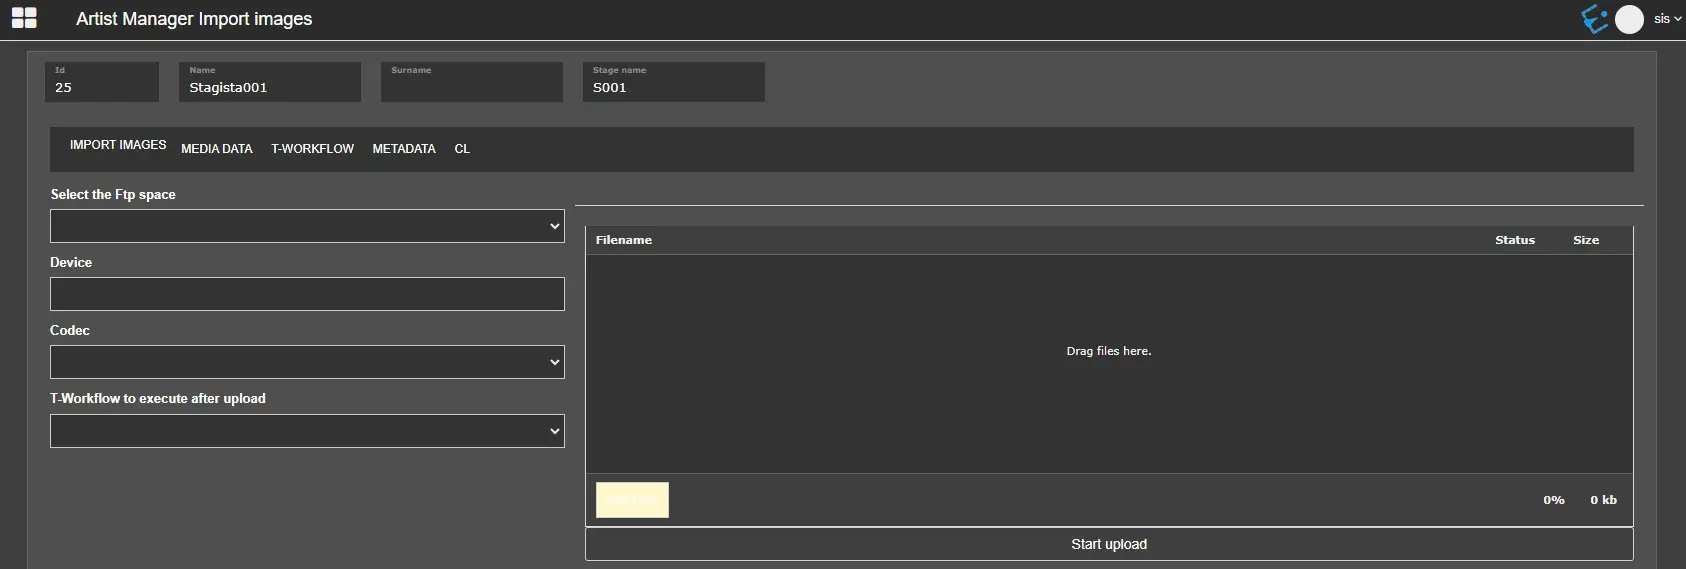
The Import images action allows the users to upload multiple images into an artist record. Once you click on the IMPORT IMAGES option, a new tab will open allowing you to upload the needed images once the following parameters are set:
ImportMultipleImages002
• Select the FTP space: Select the destination FTP path to import the images. The droplist will show only the name of the enabled media folders with function="Etereweb" and an FTP path properly set in "Etereweb download\upload path".
• Device: This represents the cloud device to which the previously selected path belongs. It is automatically filled according to the FTP space selected.
• Codec: Select the destination codec of the imported image. The codec must have content type=image in the codec properties.
• Workflow to execute after the upload: Indicate the T-workflow to be triggered after the images are uploaded.
Once all the parameters are set, click the Add files button to choose the images to upload (or drag them in the box), then press the Start Upload button.
DELETE
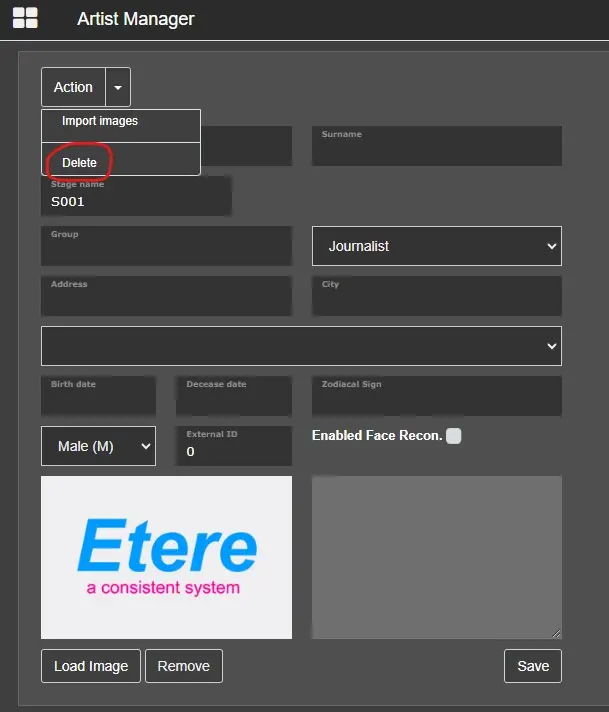
The selected artist will be permanently deleted from the database.
DeleteAnArtis
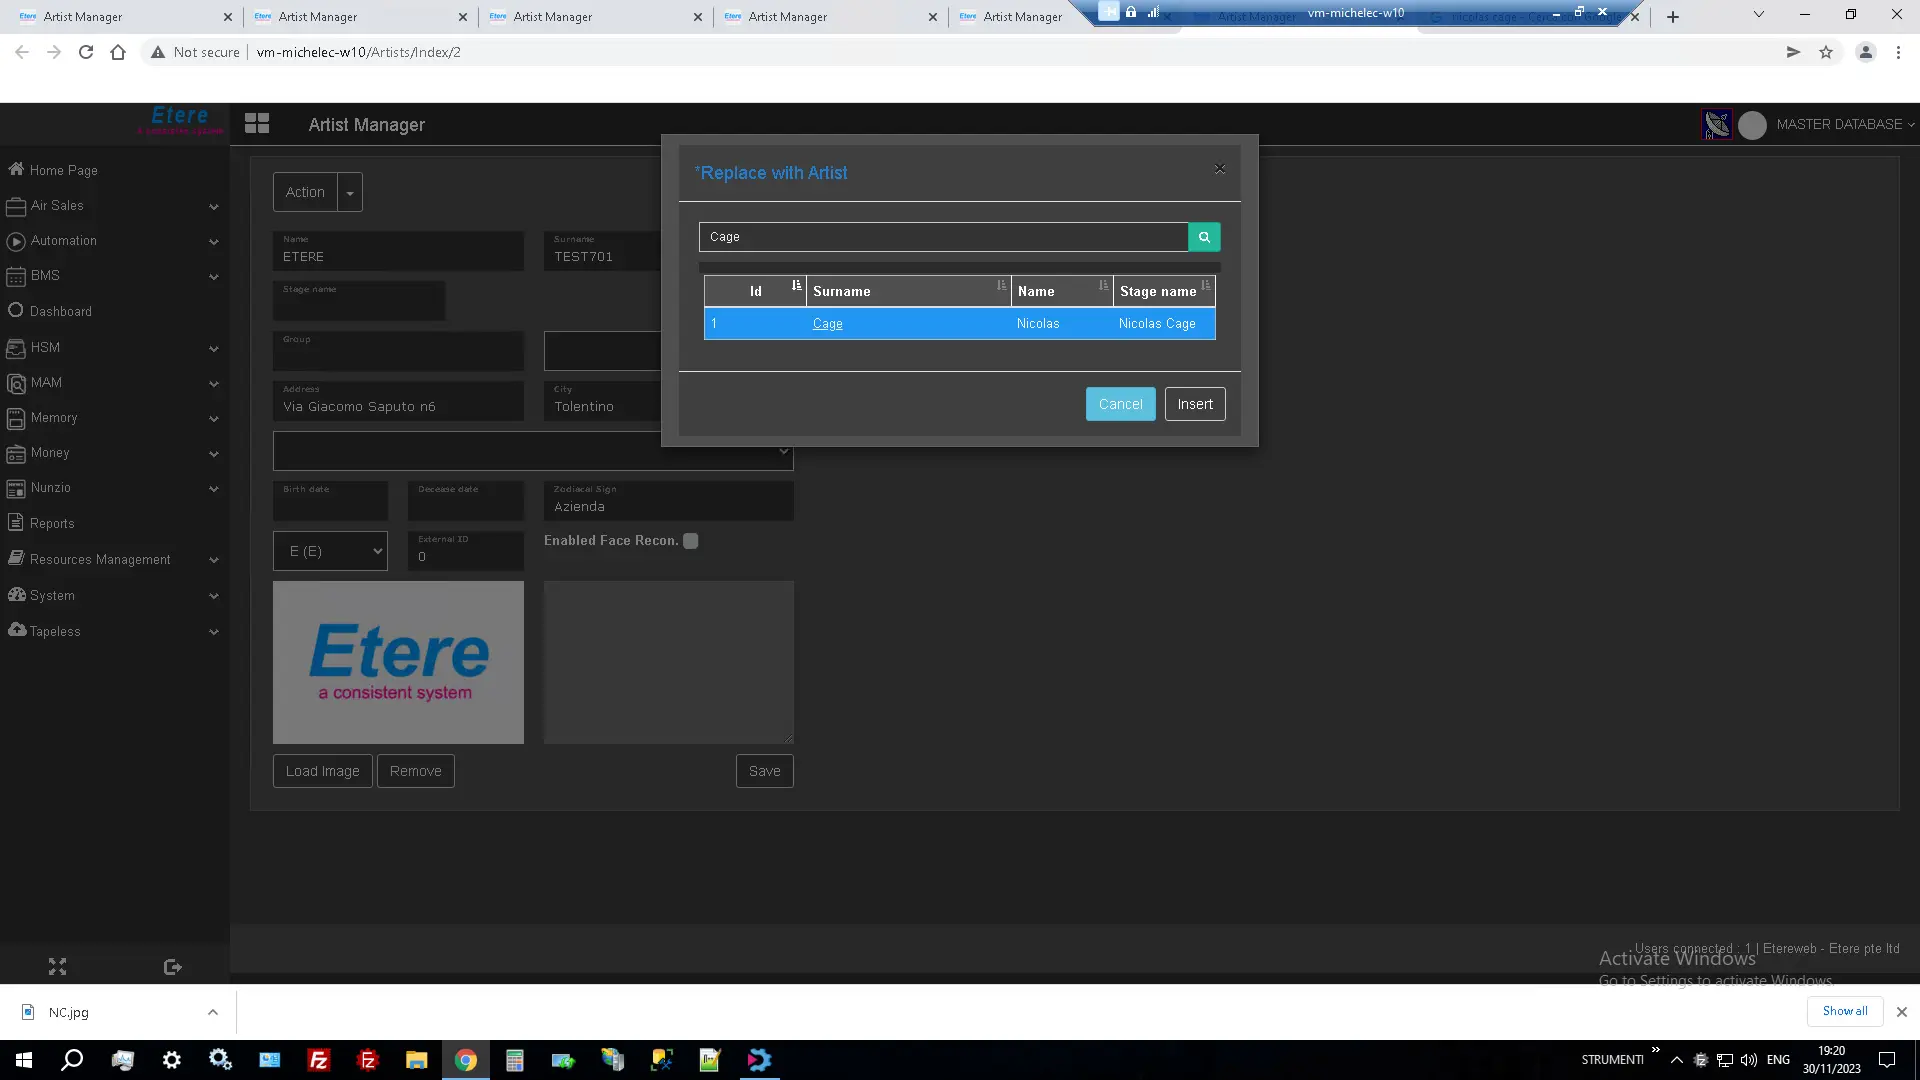
REPLACE THIS ARTIST WITH
With this function, it's possible to select a new artist to replace with the current one.
Replace-with-Artist_1
action_button
HOW TO ENABLE AN ARTIST FOR FACE RECOGNITION
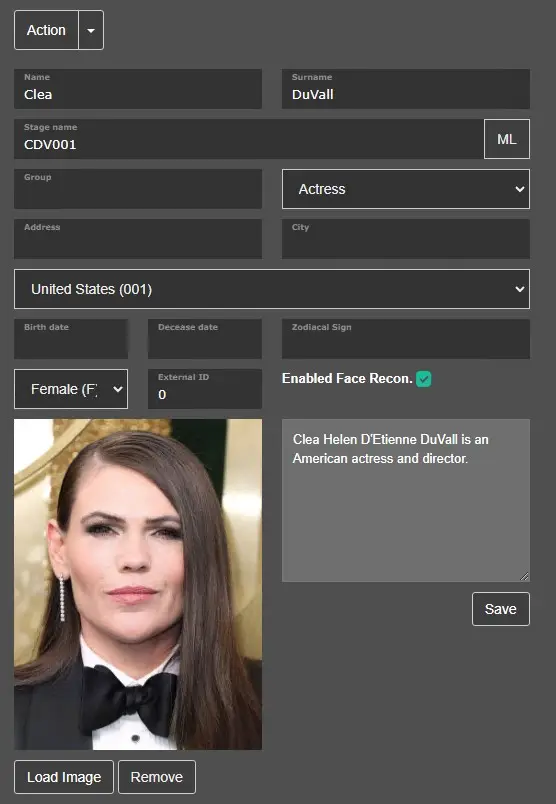
To enable face recognition in an artist, it's enough to enable the flag "Enabled Face Recon." on the artist's details page. Face recognition is mandatory to LOAD an image inside the image field.
EnableFaceRecognitionArtist
Note: if the Enabled face recognition flag is removed, the segments to which the artist has been assigned will be removed only at the next round of FR in that asset. Otherwise, they will remain unchanged.
HOW TO UPDATE AN ARTIST IMAGE
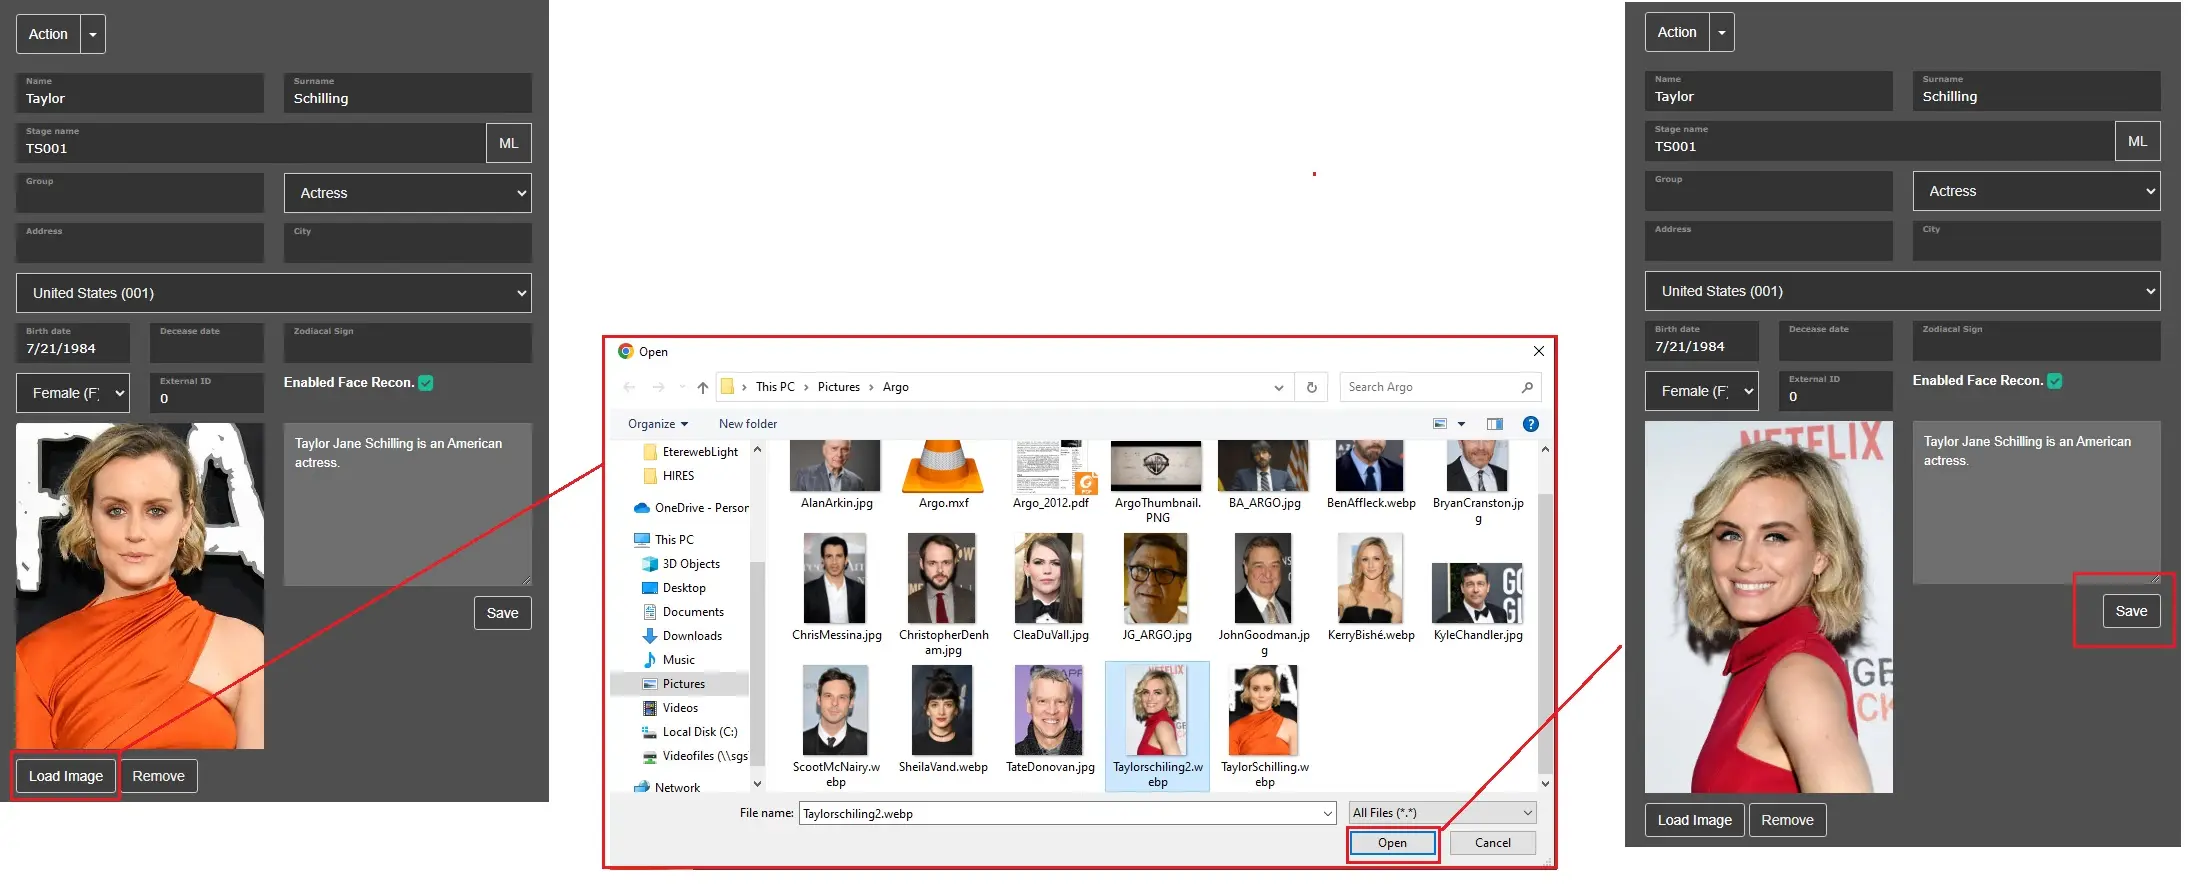
To update an image of an artist, click on the LOAD IMAGE button and select another one, then save the modification.
HowToUpdateAnImageOfAnArtist
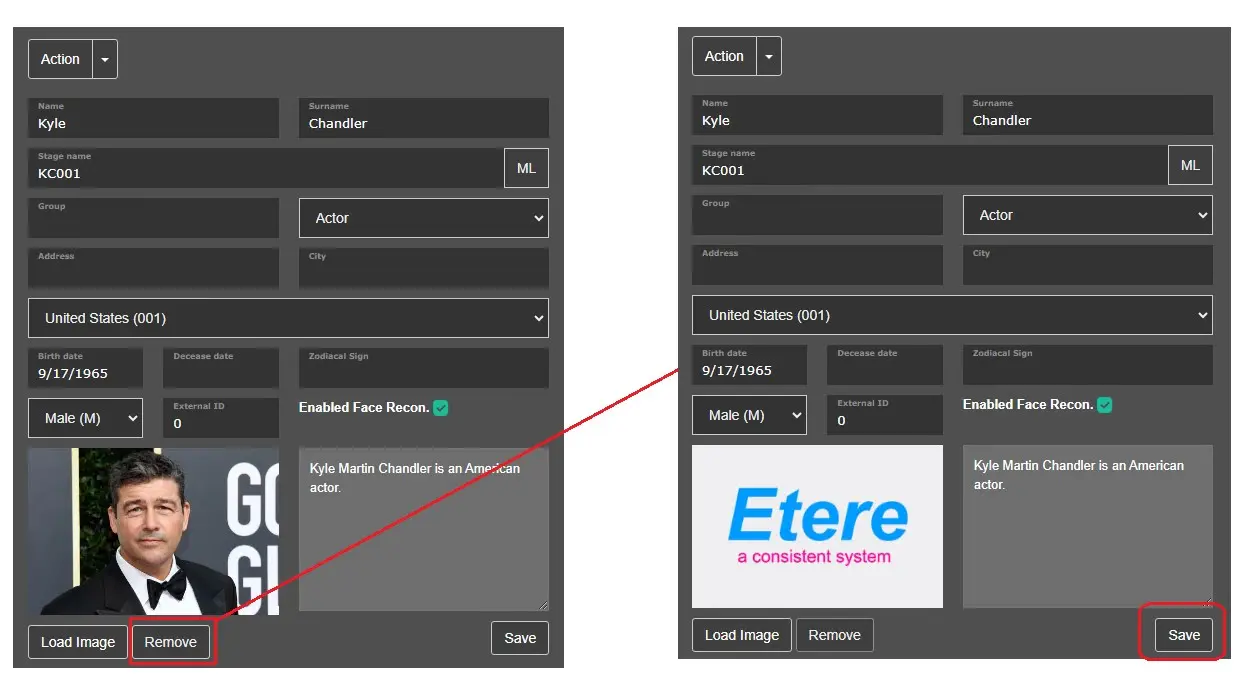
To remove an image from an artist, simply click on the REMOVE button.
HowToDeleteAnImageOfAnArtist
Note: if the image of an artist is updated or removed, the segments to which the image artist has been assigned will be updated or removed only at the next round of FR in that asset. Otherwise, they will remain unchanged.
 SystemArtistsManager
 CreateNewArtist
 ArtistManagerList
 SortByIDAsc
 SortByNameDesc
 SortBySurnameAsc
 AddOrRemoveColumns
 LayoutArtistColumns
 ImportMultipleImages001
 ImportMultipleImages002
 DeleteAnArtis
 EnableFaceRecognitionArtist
 HowToUpdateAnImageOfAnArtist
 HowToDeleteAnImageOfAnArtist
 Replace-with-Artist_1
 action_button